I have recently been trying to create a new iOS app to track Bus locations in real-time. The location data is taken from the UK's Bus Open Data Service. Having managed to get the prototype app to load some bus data directly from this service, I decided to use an AWS API Gateway as the access point to the API. At some point I will write a guide to setting this up as it took me a while to figure it out. I then setup a Cognito Identity Pool to control access to the API. Now my app needs to request access codes from here which can then be used to call the main API. My initial thought to implement this was to use the AWS-SDK-Swift to manage access. This seems like the obvious method.
Firstly, I am not a seasoned Swift developer and this is my first app, and secondly, the Swift SDK does not appear to be the most developed of the AWS-SDKs and the documentation is lacking. I perservered and eventually I was trying to use the documentation for the other SDKs to find what I needed in the Swift one. Eventually, I decided to use the AWS-SDK-CPP. I have a background in C++ development and thought that Swift and C++ interoperability was easy to achieve.
My first port of call for this was conda install aws-sdk-cpp -c conda-forge,
unfortunately this build does not include the cognito-idp module which is needed to
authenticate users using cognito.
It does provide a cognito-identity module but this seems to be more for managing user pools
rather than using them. To download AWS-SDK-CPP (with its submodules) I used:
git clone --recurse-submodules https://github.com/aws/aws-sdk-cpp
However, as this is quite a large repository even this has failed for me. To avoid such a large download, an alternative is:
git clone https://github.com/aws/aws-sdk-cpp --depth 1
cd aws-sdk-cpp
git submodule update --init --recursive --depth 1
From inside the aws-sdk-cpp directory build and install with:
cmake . -DBUILD_ONLY="cognito-idp"
cmake --build . --config=Release
cmake --build . --target install
Easy! But I actually need this for iOS and the iOS simulator. I assumed this would be easy, so got on with my own library.
So, I have my BusTracker app and the AWS-SDK-CPP installed on my Mac. I decided to write the interface to AWS-SDK-CPP as its own library, which after many name changes is now the OpenID library. The original aim behind this was to be able to import it into the BusTracker app without having to worry about including the AWS-SDK-CPP library directly.
This library is pure C++ but I also provide an optional C header which is built using:
cmake . -DC_INTERFACE=ON
cmake --build .
For this I would like to acknowledge a brilliant article, for helping me write the interface. Having completed this library all that I needed to do was include it in the BusTracker app. Well surely that is simple?
I expected this to be a flag in cmake but no such luck. Firstly, after much research and head-scratching, I found that a toolchain file is helpful in this situation. For this I found the iOS-CMake Library which is a fork of an earlier library of the same name. This library recommends building using
cmake -B build -G Xcode -DCMAKE_TOOLCHAIN_FILE=${IOSCMAKE_DIR}/ios.toolchain.cmake -DPLATFORM=${PLATFORM}
cmake --build build --config Release
where ${PLATFORM} may be one of a number of Apple Platforms.
As I am using an Apple Silicon Mac, the relevent options for me are:
However, the library also provides the following options:
These options build FAT libraries which combine the libraries for the device and
the simulator into a single
library. These must be built using the Xcode generator and must be installed using
cmake --install . --config Release.
I attempted to build the OS64COMBINED library for AWS-SDK-CPP without success.
However, this builds the library for both arm64 and x86_64 architectures,
unnessecesary on a Apple Silicon Mac.
Instead, I recommend building the libraries separately and then combining later.
Following that generic discussion on building libraries for iOS and simulator, it seems the work is done. In fact, there are a number of other issues when compiling AWS-SDK-CPP for iOS. The full cmake configure command that I used in the end, after much trial and error, was:
cmake ${AWS_DIR} -DCMAKE_TOOLCHAIN_FILE=${IOS_CMAKE_DIR}/ios.toolchain.cmake -DPLATFORM=${platform} -DBUILD_ONLY="cognito-idp" -G Xcode -DCMAKE_INSTALL_PREFIX=${AWS_BUILD_DIR}/install/${platform} -DUSE_CRT_HTTP_CLIENT=ON -DDEPLOYMENT_TARGET=18.0 -DFORCE_SHARED_CRT=OFF -DBUILD_SHARED_LIBS=OFF -DCPP_STANDARD=17 -DTARGET_ARCH=apple -DHAS_MOUTLINE_ATOMICS=OFF
Unpacking these, the first four should be obvious from above. I personally built the library for
OS64 and SIMULATORARM64, using the latest deployment target.
I wanted to build the static version of the library so set BUILD_SHARED_LIBS=OFF
and FORCE_SHARED_CRT=OFF.
Additionally, the option USE_CRT_HTTP_CLIENT=ON is necessary to avoid a
dependence on libcurl and, by extension libssl.
Finally, the option -DHAS_MOUTLINE_ATOMICS=OFF is necessary to build with the XCode generator.
In this configuration, the only dependency is zlib which is available in the XCode SDKs.
Following this, building and installation are simple using:
cmake --build . --config Release
cmake --install . --config Release
to install the libraries in directory ${AWS_INSTALL_PREFIX}/${PLATFORM}. Doing this for both
platforms should not present a problem.
Having built AWS-SDK-CPP, two steps remain:
Building OpenID is relatively simple, a
CMakePresets.json
file is included the OpenID repository
with configurations iOSBuild and iOSSimulatorBuild. However, the complete cmake configure
commands is
cmake . -DCMAKE_TOOLCHAIN_FILE=${IOS_CMAKE_DIR}/ios.toolchain.cmake -DPLATFORM=${PLATFORM} -G Ninja -DCMAKE_INSTALL_PREFIX=${OPENID_INSTALL_PREFIX}/${PLATFORM} -DDEPLOYMENT_TARGET=18. -DAWSSDK_ROOT_DIR=${AWS_INSTALL_PREFIX}/${PLATFORM} -DC_INTERFACE=ON -DUSE_CATCH=OFF -DBUILD_SHARED_LIBS=OFF
where ${AWS_INSTALL_PREFIX}/${PLATFORM} is the location where the AWS-SDK-CPP library for the
respective platform was installed.
If OpenID built correctly, there should be two static library files for each
platform, libOpenID.a
contains the full OpenID C++ library and libOpenIDC.a includes the C interface
functions. The header file we need is OpenID.h,
which is inside the libraries include directory. Having built
these, all that remains is to include these in Xcode.
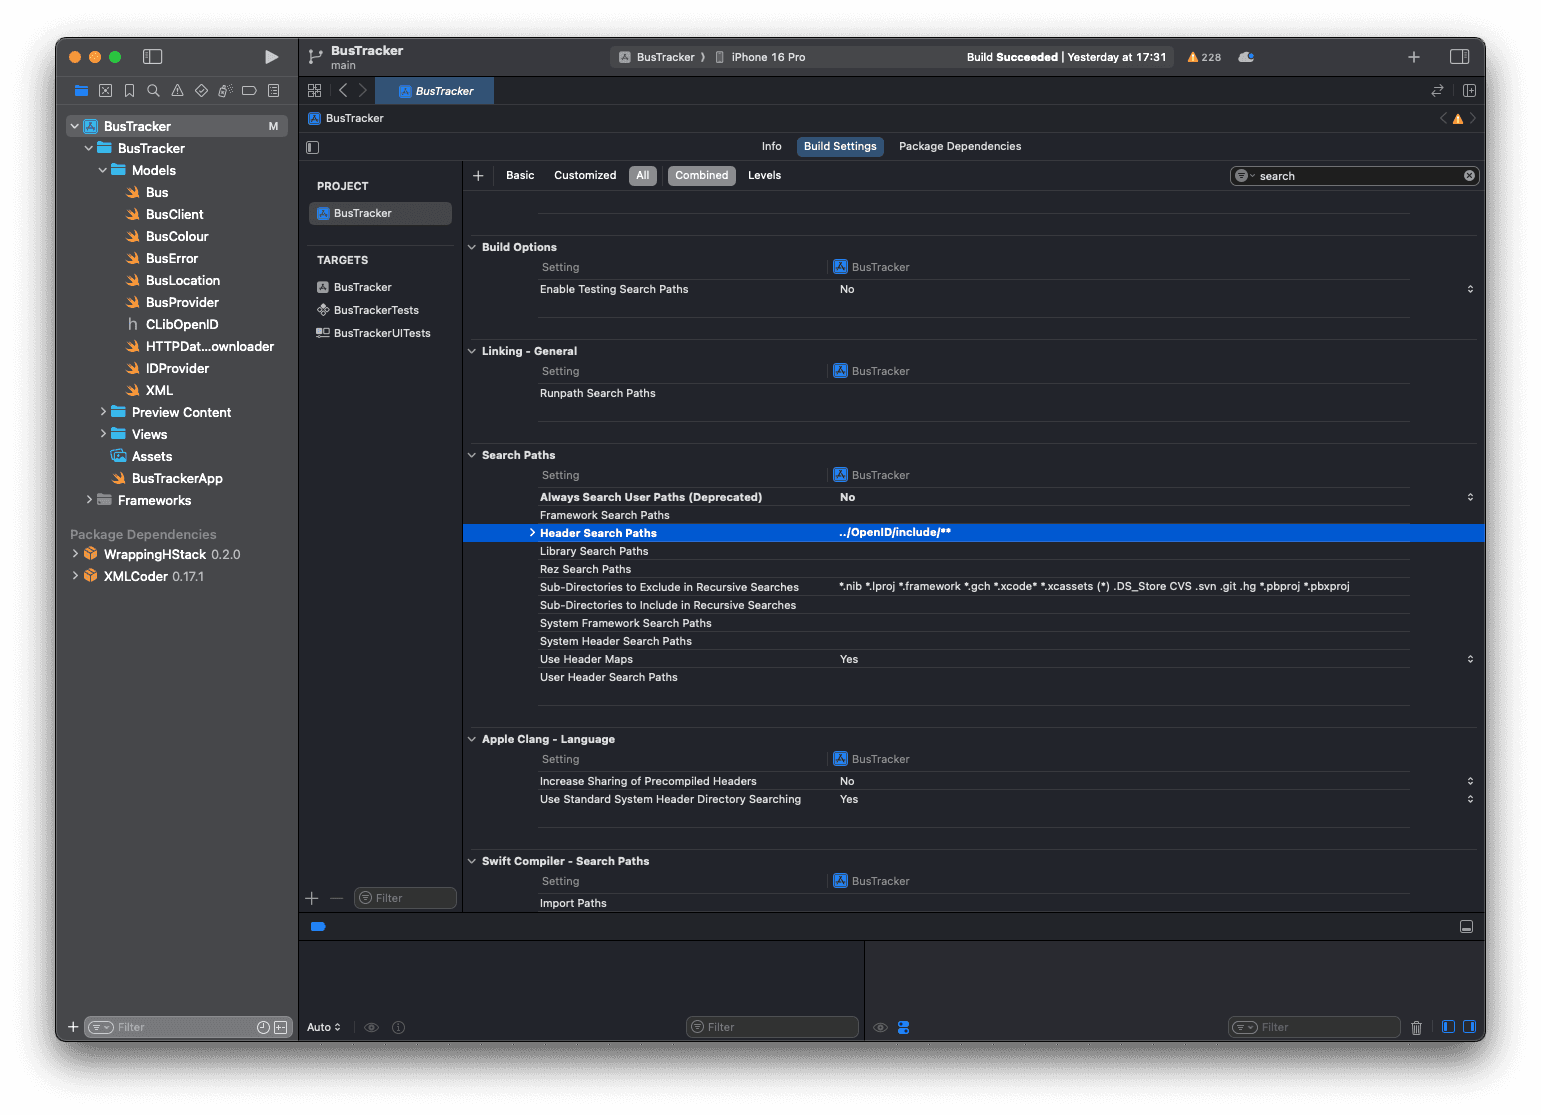
Open the XCode project settings, in the "Search paths" section, add all header file locations to "Header Search Paths".
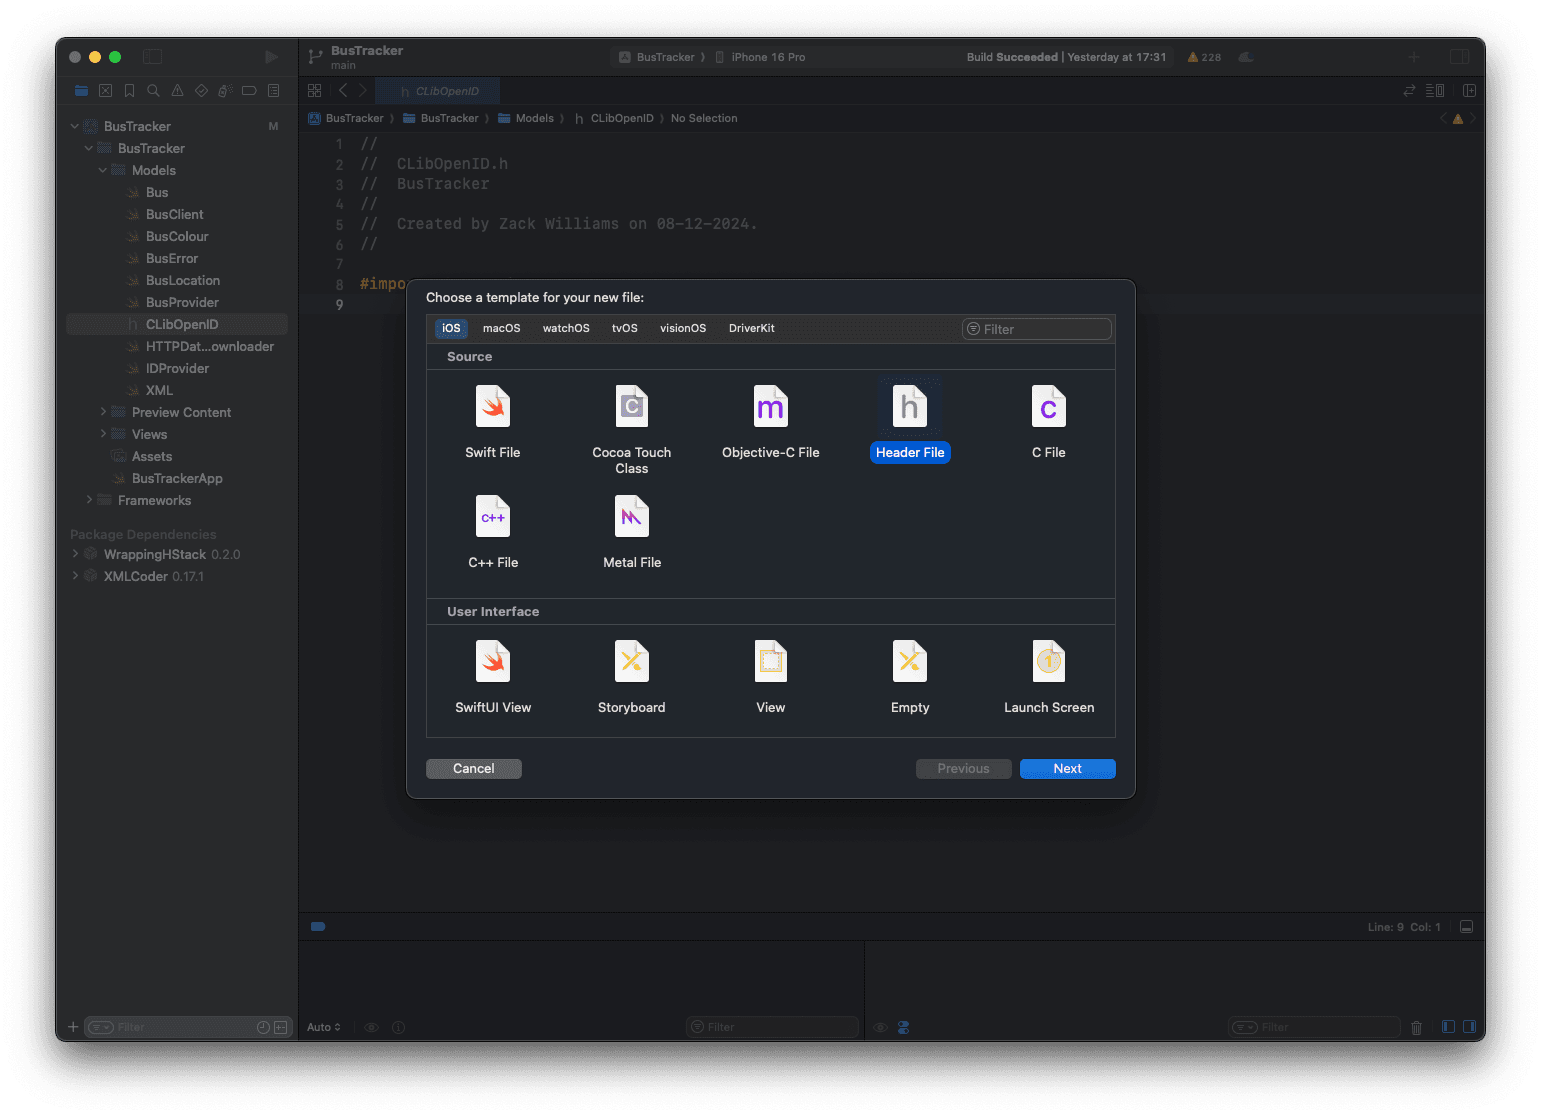
In order to include a C header in Swift code, an objective C bridging header is required. To create this navigate to "Create new file from template.." in Xcode and choose "Header file".
The file should include all header files to be used in the project, for the BusTracker example, this is simple:
// Bridging header file
#import "OpenID.h"
In the case of a header only library, this would be all that is required. For a library with pre-built binaries, additional steps are required. The aim is to include all neccessary libraries as XCode frameworks, these act as combined libraries for multiple platforms similar to a FAT library but for platforms rather than architectures.
Assuming the static libraries libOpenID.a and libOpenIDC.a have been built for
each platform, these may be combined into XCFrameworks using the command
xcodebuild -create-xcframework -library ${OPENID_INSTALL_PREFIX}/iphoneosBuild/Release-iphoneos/libOpenID.a -library ${OPENID_INSTALL_PREFIX}/iphonesimulator/Release-iphonesimulator/libOpenID.a -output ${OUTPUT_DIR}/libopenID.xcframework
and similarly for libOpenIDC.a.
My original aim when creating this project was for the libOpenIDC.a to bundle
all dependencies into a single file. Unfortunately, this is not the case,
and while this may be possible, the easiest option is to convert each AWS-SDK-CPP
library to an XCFramework using the above method and adding to XCode as a dependency.
Now that the external dependencies are converted to XCFrameworks the rest is simple.
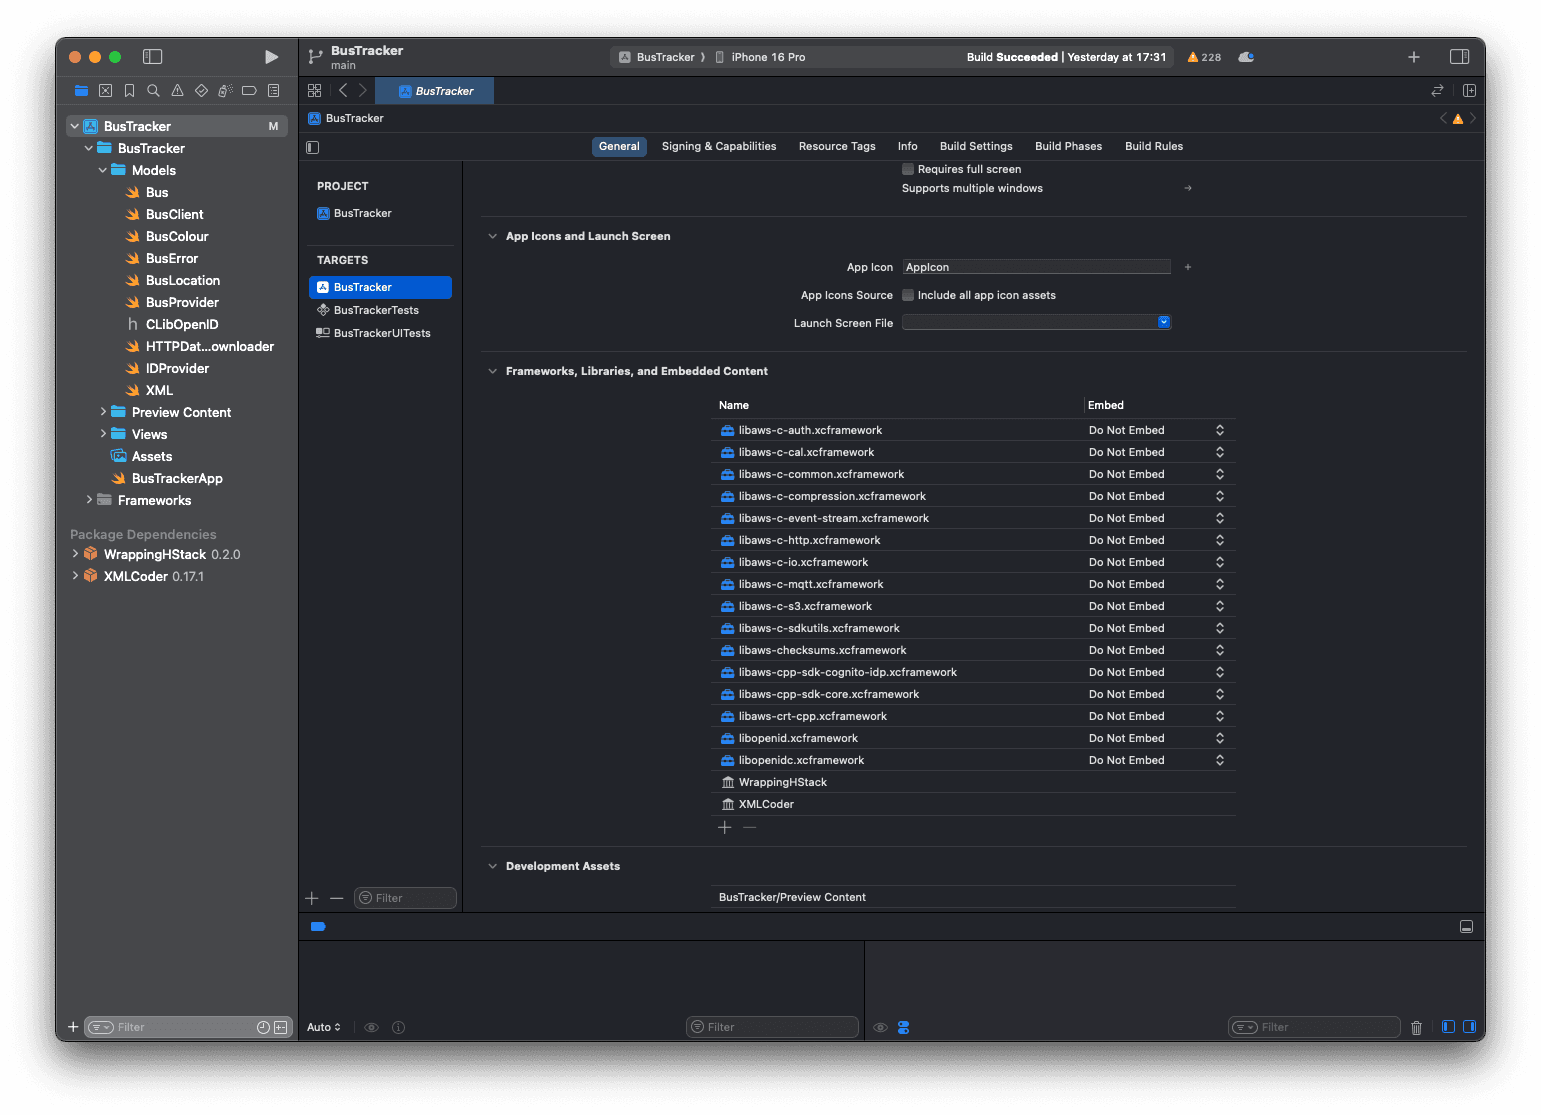
Simply navigate to the project's settings choose the settings for the desired target, go to the
"General" tab and find the "Frameworks, Libraries, and Embedded Content" section.
Choose the + icon and add all the libraries to Xcode.
At this point I originally thought I was finished. However, after using more of the functions
in OpenID, the app failed to compile. After much head scratching,
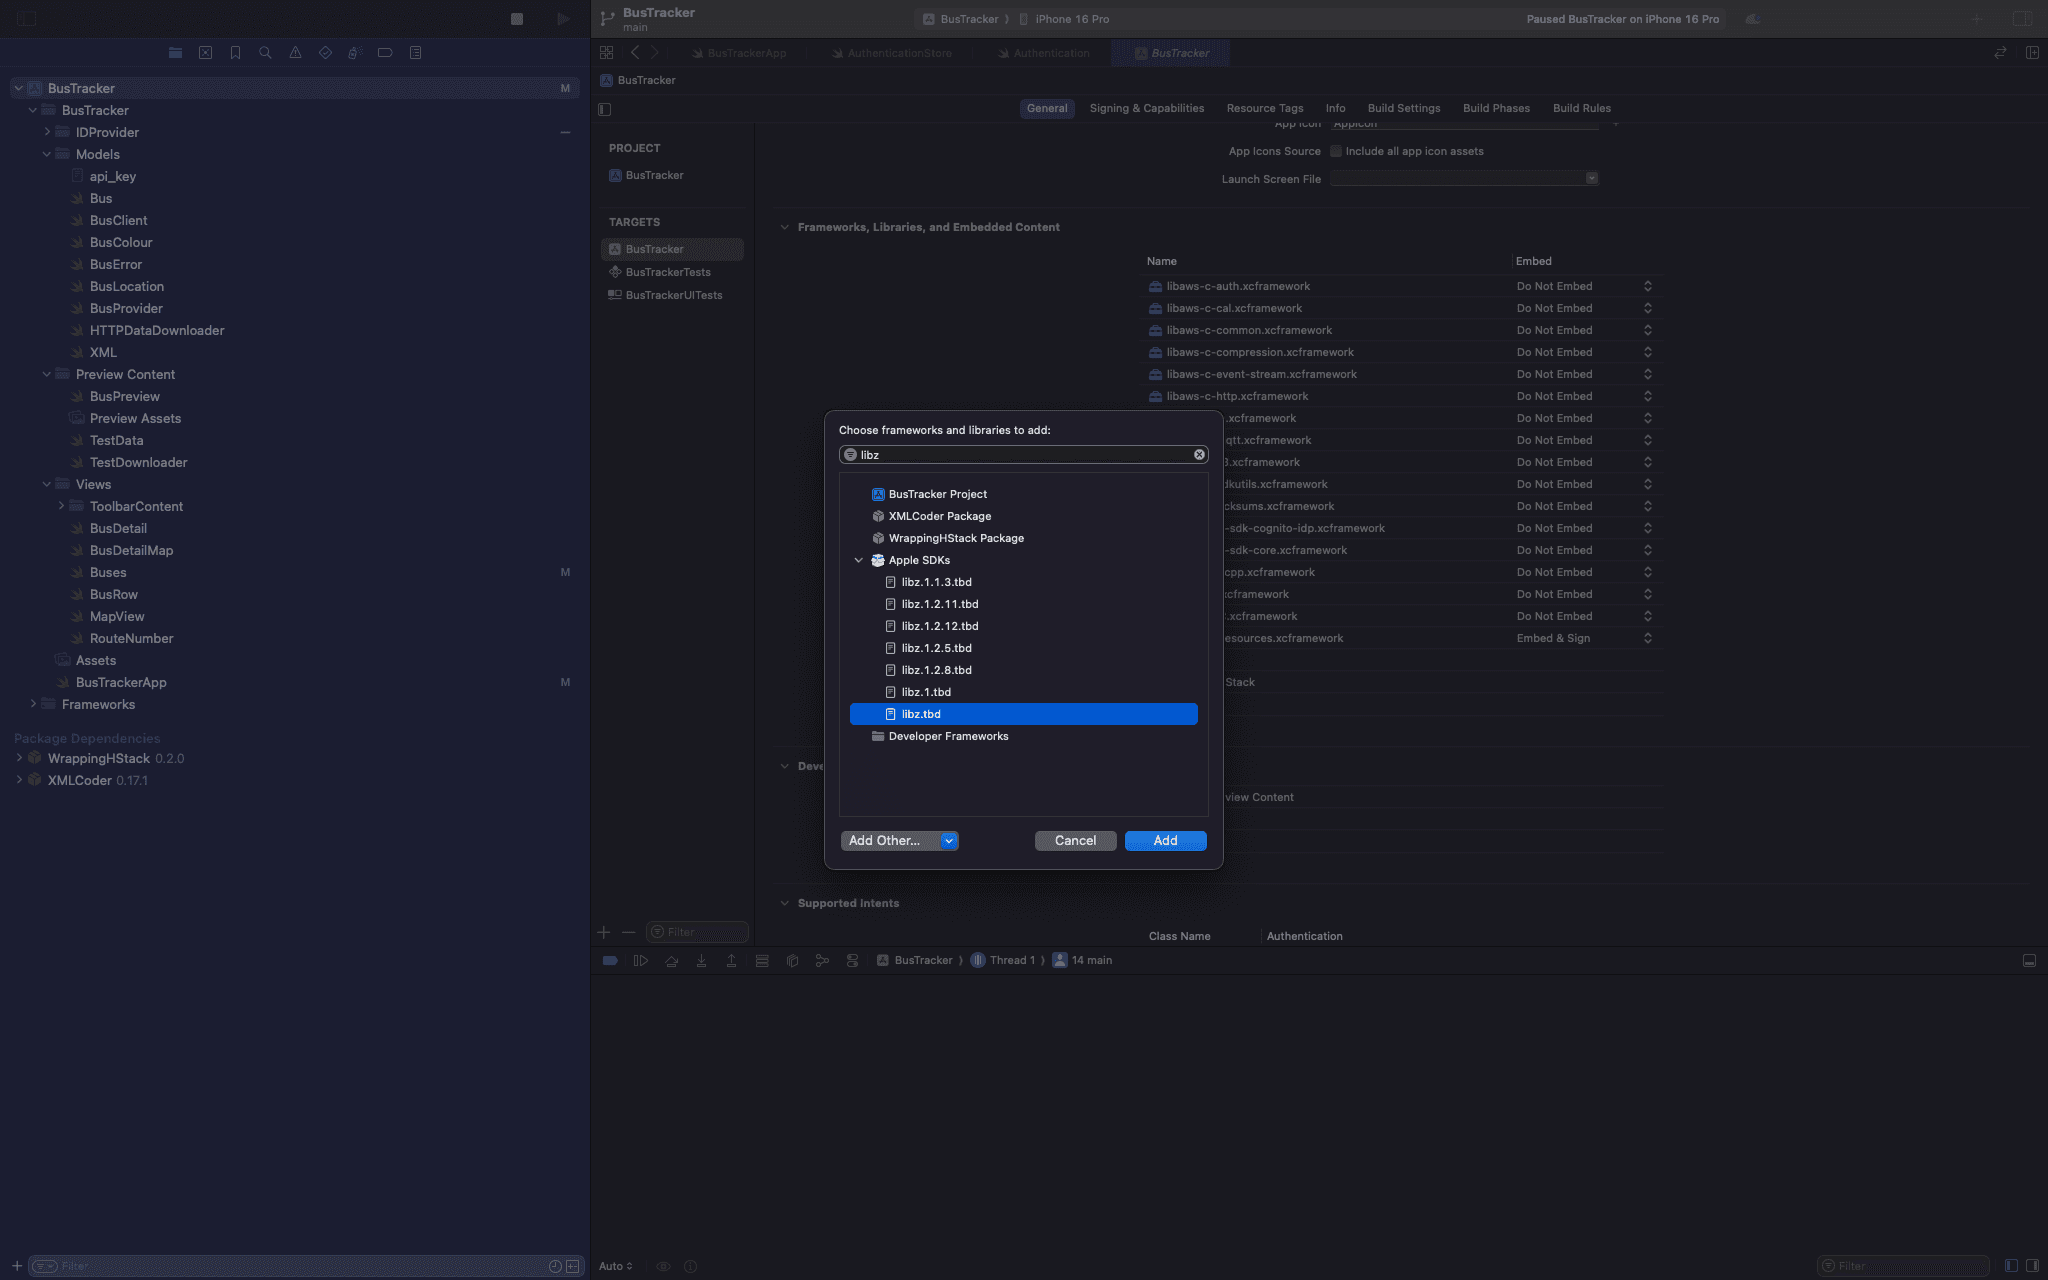
I figured out that it is also necessary to include zlib for the aws-crt-cpp module.
This can be done easily by choosing the + icon again and adding libz.tbd to the embedded content
list.
After this, the app should compile and run.
In a continuing effort to create an iOS app with an AWS API Gateway, I have used the AWS-SDK-CPP to request authentication using the Cognito Identity Provider inside a new project OpenID. I have built static libraries for both this project and the SDK for iOS and iOSSimulator on an Apple Silicon Mac. I have created XCFrameworks for each library and imported them into Xcode using an objective-C bridging header to expose the C functions to Swift.
The next step is to build the Swift interface for the OpenID library and then use the authentication results to call the API gateway.